Kitchen Lighting: Layering Task, Ambient & Accent Light
15 April 2025 · 4 min read
Most of the kitchens I'm asked to renovate around Gisborne have one thing in common: a single light fitting in the middle of the ceiling, and a homeowner standing in their own shadow while they chop onions. Lighting is the part of a kitchen people think about last, yet it's the thing you notice every single day. Get the layers right and even a modest kitchen feels considered and easy to work in.
Start with task lighting where you actually work
Task lighting is the non-negotiable layer. It's the light that lands directly on your bench, hob and sink so you can see what you're doing without your own body blocking it.
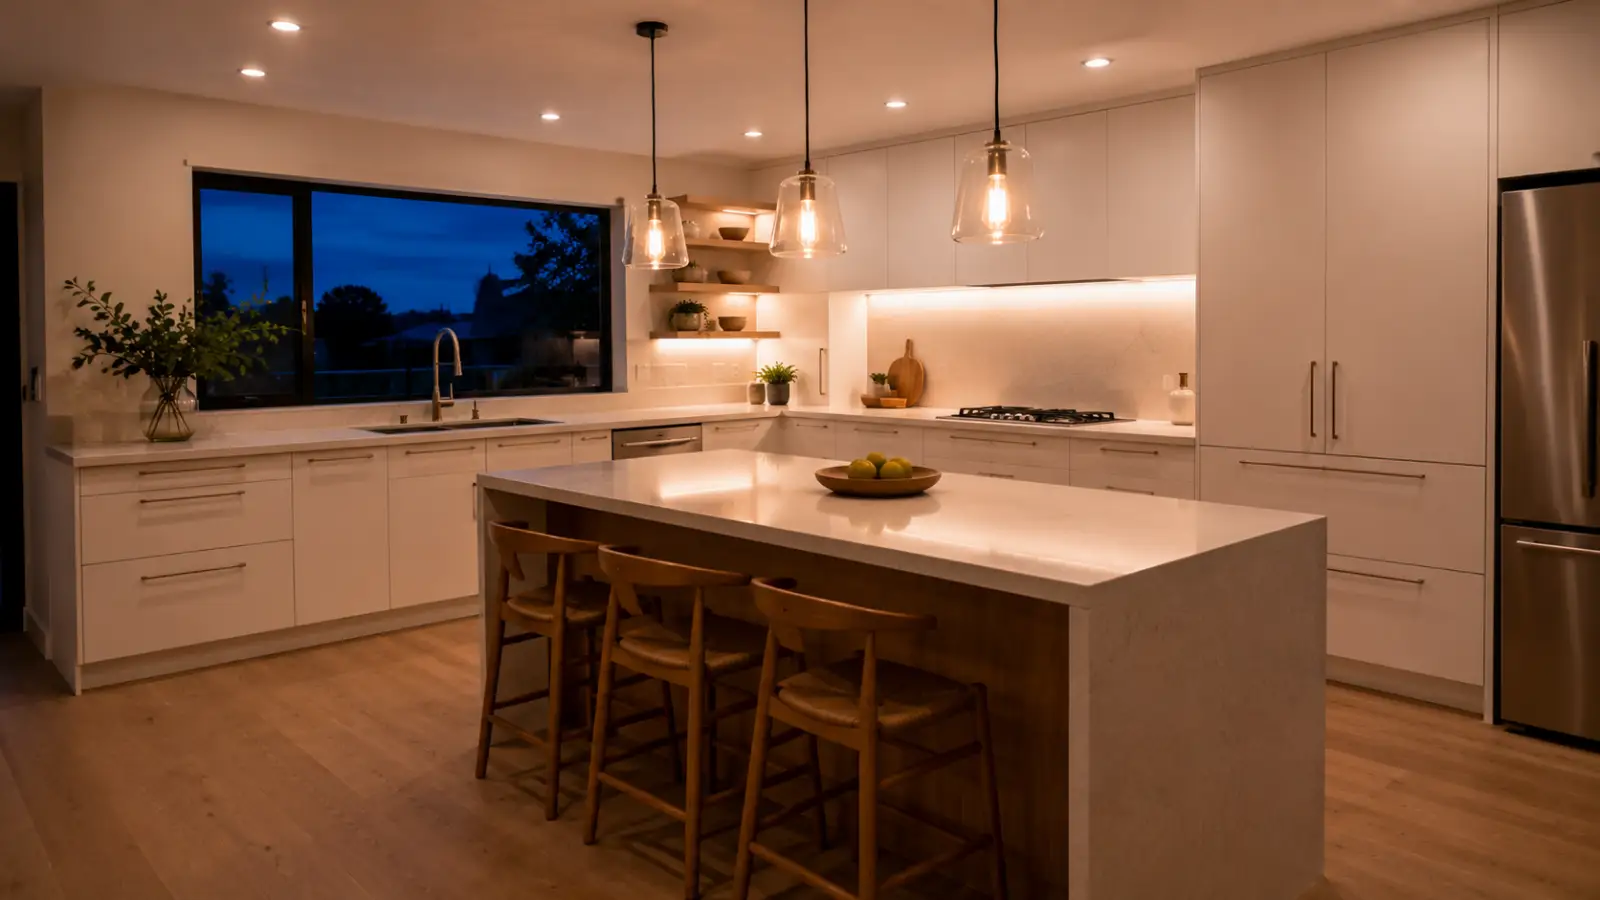
The workhorse here is under-cabinet lighting — an LED strip or thin profile tucked under the upper cabinets, lighting the benchtop below. A few things I've learned fitting these in real kitchens:
- Mount the strip toward the front of the cabinet underside, not the back, so the light falls on the bench rather than the splashback.
- A recessed aluminium channel with a frosted diffuser hides the individual diodes — no dotty reflections in a glossy splashback.
- Aim for a continuous run along the main prep zone rather than a single puck in the middle.
Over an island with no cabinets above, pendants do the task work. Hang them with the bottom of the shade roughly 700–800mm above the benchtop so they light the surface without blocking sightlines across the room. For a standard island I'll usually run two or three evenly spaced.
Ambient light fills the room
Ambient (or general) lighting is the soft overall layer that stops the room feeling like a cave once the sun drops — and in a Gisborne winter that's well before dinner.
This is where ceiling downlights earn their place. The common mistake is one row straight down the centre, which lights the floor and leaves your benches in shadow. I prefer to position downlights roughly above the front edge of the benchtops so they wash the work surfaces too, then fill the walkways. Spacing them about 1.2–1.5 metres apart in a normal-height ceiling gives even coverage without it looking like a runway.
A warm, even ambient layer also makes the kitchen feel connected to the living spaces it usually opens onto in our open-plan homes.
Accent light is the finishing touch
Accent lighting does no heavy lifting — it's there for depth and atmosphere, and it's the layer that makes a kitchen feel custom rather than builder-standard.
The two I fit most often:
- Toe-kick lighting — a low strip recessed under the base cabinets that throws a soft glow across the floor. It doubles as a gentle night light for midnight glasses of water.
- In-cabinet or glass-cabinet lighting — strips inside open shelving or glass-fronted units that lift your nicer pieces out of the gloom.
Accent light is also the easiest thing to plan into a build from the start and the most painful to retrofit later, because the wiring needs to be chased in before the cabinets go in. Because we design, build and install our kitchens in the one workshop, we run those cable routes while the carcasses are still on the bench.
Colour temperature: get this wrong and nothing looks right
Colour temperature is measured in kelvin (K), and it's the difference between a kitchen that feels warm and one that feels like a surgery.
For a home kitchen I almost always recommend around 3000K — a soft warm white that flatters timber, stone and skin tones. Push up to 3500K if you want a slightly crisper, brighter feel for serious prep. I'd steer clear of 4000K and above in a living kitchen; it reads cold and clinical against natural materials.
The single most important rule: keep every fitting in the room the same colour temperature. Mismatched whites are the quickest way to make a brand-new kitchen look cheap.
Also check the CRI (colour rendering index) on your fittings — aim for 90 or above so food and finishes show their true colour.
Switching zones so you're not flooding the room at 6am
The final piece is control. Wiring every light to one switch wastes the layering you've just paid for. I split a kitchen into separate switching zones so each layer works independently:
- Task lights (under-cabinet, pendants) on their own switch
- Ceiling ambient downlights on another
- Accent (toe-kick, in-cabinet) on a third, ideally on a dimmer
That way you can have just the toe-kick and under-cabinet strips on for an early start, then bring up the ambient layer when the family arrives. Dimmers on the ambient and accent circuits are an inexpensive upgrade that pay you back every evening — just make sure the dimmer is rated as LED-compatible, or you'll get flicker and buzz.
Plan the lighting at the same time as the cabinetry, not after, and you'll have a kitchen that works as well at night as it does in the morning. It's one of the details our 5-year workmanship warranty quietly depends on getting right the first time.
Sukhman Singh
Founder & Cabinet Maker, Flow Joinery
Sukhman designs and builds bespoke kitchens, wardrobes and cabinetry across Gisborne. Read more →
Reviews
No reviews yet — be the first to share your thoughts.
Sign in or create an account to leave a review.